Easily integrate your keycloak Authentication service for seamless logins.
Integrating your keycloak service into a SSO portal
For companies that operate multiple services, the advantages of Single Sign-On (SSO) cannot be overstated. At its core, an SSO solution offers users the ability to access multiple applications using a single set of credentials. This doesn't only streamline the user experience but also bolsters security by minimizing the number of passwords an individual must remember and potentially compromise.
One of the challenges companies face when implementing an SSO solution is integrating existing services. If your service utilizes Keycloak, you're in luck. Integrating Keycloak into an SSO strategy is a straightforward process, and in this post, I'll guide you through it.
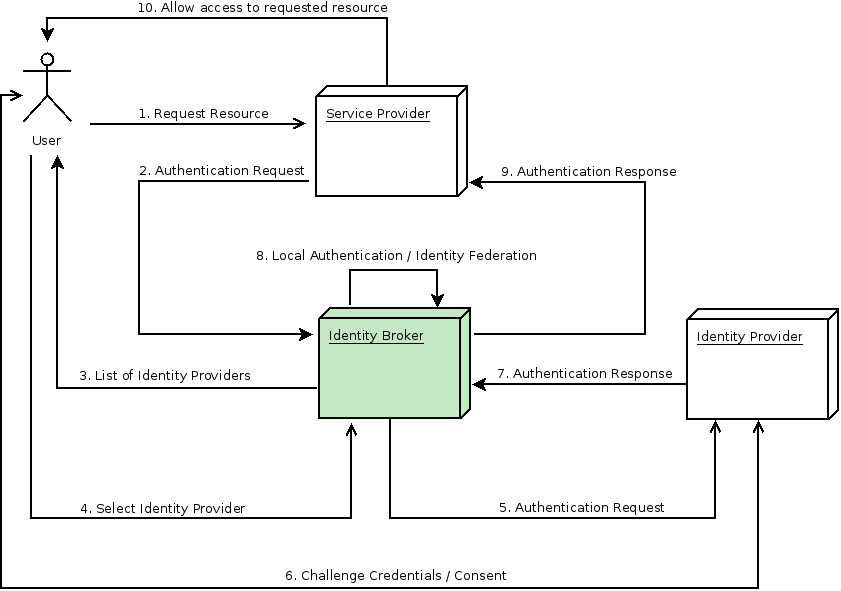
This is a flow diagram to showcase how the flow will end up looking.

Step 1: Introduce a New Identity Provider in Keycloak
Keycloak boasts an impressive flexibility in its support for various identity providers. To seamlessly integrate with an SSO solution, your first move is to add a new identity provider based on OpenID Connect (OIDC). OIDC is a popular authentication layer on top of the OAuth 2.0 protocol, and its compatibility with Keycloak ensures that the integration is smooth.
Step 2: Create an Endpoint for Login URL
After setting up the OIDC identity provider in Keycloak, the next step is to create an endpoint on your service. This endpoint will be responsible for generating a login URL. The critical component of this URL is the kc_idp_hint query parameter.
Why is this so crucial? When a user attempts to log in via the SSO portal, the portal will use the kc_idp_hint query parameter to determine which identity provider to utilize. This ensures that users are directed to the appropriate service for authentication.
If you're using the keycloak JS SDK you need to inject the idpHint parameter before calling the .init() method.
import Keycloak from 'keycloak-js'

const keycloak= new Keycloak(customOptions)
if (window.location.href.match(/\/oidc-provider-login$/)){
  let kcLogin= keycloak.login
  keycloak.login= (options)=>{
    options.idpHint="my-oidc-provider"
    options.redirectUri= window.location.href.replace(/\/oidc-provider-login$/, '')
    return kcLogin()
  }
}

// Now you can call init and will be prompted to log in with the oidc-provider
keycloak.init()
This way, you can add a link to /oidc-provider-login which will prompt the service to auth against your newly added identity provider.
In Conclusion
Integrating a service that relies on Keycloak into an overarching SSO strategy doesn't need to be a daunting task. By simply adding a new OIDC identity provider and creating a specialized endpoint, you can ensure a seamless and secure login experience for your users. In the digital age, where every click and second counts, optimizing the user journey through solutions like SSO can make all the difference.
The docs on the key cloak side you'll want to look are here


